
To check low voltage output caused by capacitors and brushes, first turn off and unplug your device. Discharge capacitors safely before testing with a multimeter set to capacitance, comparing the readings to the manufacturer’s specs. Inspect the brushes for wear, pitting, or damage, and replace them if needed, ensuring springs maintain proper tension. Continuing with this process will help you identify and fix the common issues affecting your device’s voltage.
Key Takeaways
- Discharge capacitors safely before testing to prevent electrical shocks.
- Use a multimeter or capacitance tester to verify capacitor values against manufacturer specs.
- Inspect brushes for wear, pitting, or damage, and replace if necessary to ensure proper contact.
- Check brush springs for proper tension to maintain voltage stability and consistent device performance.
- Regularly inspect and maintain capacitors and brushes to prevent low voltage issues and prolong equipment lifespan.
Have you ever wondered why certain electronic devices don’t operate properly or fail to power up? Often, the culprit lies within the components that keep the device functioning smoothly. Two common issues that can lead to low voltage output are problems with capacitors and brushes. Addressing these issues requires a clear understanding of capacitor testing and brush inspection, which are essential steps in troubleshooting and repairing electrical equipment.
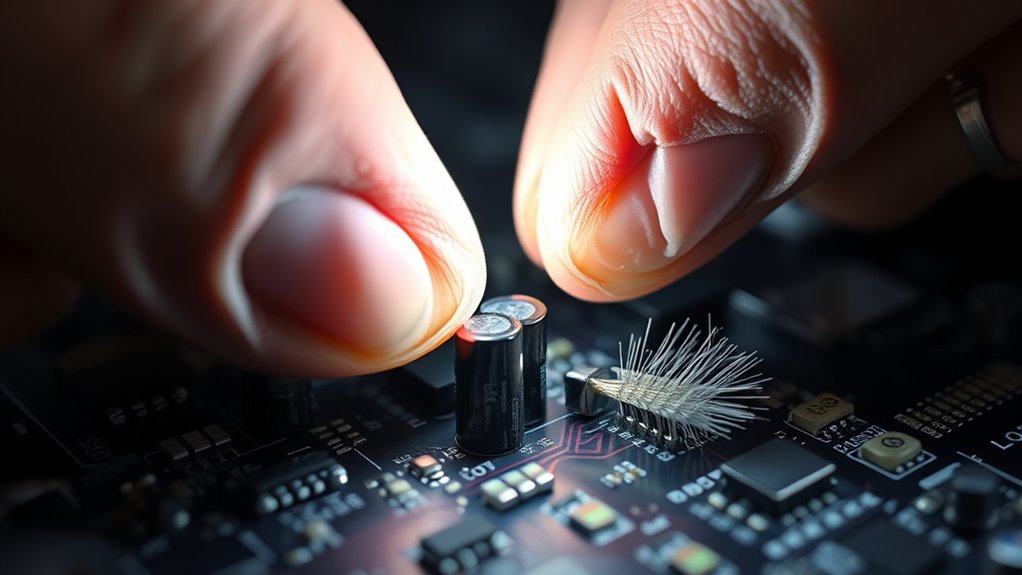
When dealing with low voltage output, your first step should be to check the capacitors. Capacitors store and release electrical energy, helping regulate voltage levels within the circuit. Over time, capacitors can degrade, leak, or short-circuit, which directly impacts voltage stability. To perform capacitor testing, you’ll need a digital multimeter with a capacitance setting or a dedicated capacitor tester. Carefully discharge the capacitor before testing to prevent electrical shock, then connect your tester probes across the capacitor terminals. If the reading deviates substantially from the manufacturer’s specifications or if the capacitor shows signs of bulging, leaking, or corrosion, it’s a clear indicator that the capacitor needs replacing. Failing capacitors can cause insufficient voltage levels, leading to underperformance or complete failure of the device.
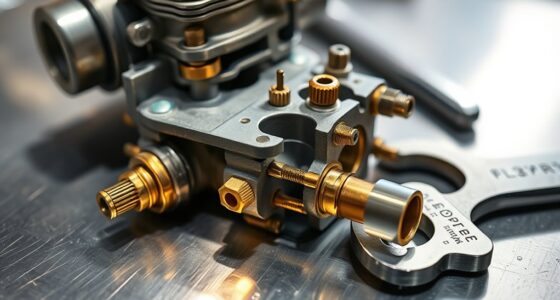
In addition to capacitors, inspecting the brushes of motors or generators is equally essential. Brushes transfer electrical current between stationary and rotating parts, and their condition directly affects voltage output. During brush inspection, turn off the device and carefully remove the brushes to examine their surface and length. Worn or pitted brushes create poor contact, resulting in voltage drops and inconsistent power delivery. If the brushes are visibly worn down to the extent that they no longer make proper contact, replace them with new ones that match the original specifications. Also, check the brush springs; weak or damaged springs won’t maintain proper pressure, causing intermittent contact and voltage fluctuations. Regular maintenance of these components can prevent unexpected failures and ensure optimal performance.
Both capacitor testing and brush inspection are straightforward but indispensable steps in maintaining and troubleshooting electrical and electronic devices. Regularly checking these components can prevent unexpected failures and guarantee your device operates at top voltage levels. Remember, safety always comes first—discharge capacitors properly and handle brushes with care to avoid injury. By systematically inspecting and testing these parts, you can identify the root causes of low voltage issues early and take corrective action before more serious damage occurs. Ultimately, understanding how to evaluate capacitors and brushes not only enhances your troubleshooting skills but also prolongs the lifespan of your equipment, guaranteeing it performs reliably when you need it most. Proper maintenance techniques are crucial for long-term device performance and safety.
Oxseryn Power Equipment 4400 Watts Inverter Generator Gas Powered, Portable Open Frame Generator, Low Noise with ECO Mode, RV Ready, Emergency Home Backup
𝗣𝗼𝘄𝗲𝗿𝗳𝘂𝗹 𝗢𝘂𝘁𝗽𝘂𝘁 - 4400 peak watts and 3400 running watts, perfect for RV camping and home backup
As an affiliate, we earn on qualifying purchases.
Frequently Asked Questions
How Can I Prevent Capacitor Failure in Low Voltage Circuits?
To prevent capacitor failure in low voltage circuits, you should regularly inspect and replace aging capacitors before they fail. Use quality capacitors that meet the required voltage ratings to guarantee proper voltage regulation. Avoid exposing capacitors to extreme temperatures or voltage spikes, which can cause damage. Properly solder and secure connections, and keep the circuit clean to reduce corrosion. Regular maintenance helps extend capacitor lifespan and maintains consistent low voltage output.
What Are Common Signs of Worn Brushes in Electrical Motors?
You’ll notice worn brushes in your electrical motor when it starts sparking excessively, making unusual noises, or experiencing inconsistent operation. Reduced motor performance and visible damage or uneven wear on the brushes are clear signs of brush wear. Regular motor maintenance helps spot these issues early, preventing further damage. Keep an eye on brush length and replace them when they become too short to guarantee your motor runs smoothly and efficiently.
Can Low Voltage Output Damage Capacitors or Brushes?
Yes, low voltage output can damage capacitors and brushes. When voltage drops, capacitors may experience leakage or fail prematurely, reducing their effectiveness. Similarly, inconsistent voltage can cause uneven brush wear patterns, leading to premature motor failure. Keep an eye on voltage levels to prevent damage, and regularly inspect capacitors for leakage and brushes for uneven wear, ensuring your motor runs smoothly and efficiently.
Are There Specific Testing Tools for Checking Capacitor Health?
Yes, there are specific tools for capacitor testing, like a capacitance meter or multimeter with a capacitance setting, which help you measure the capacitor’s health accurately. During brush inspection, you should look for wear or corrosion that could affect performance. Using these tools guarantees you catch issues early, preventing potential damage to your equipment and maintaining ideal operation. Regular testing and inspection are key to keeping everything running smoothly.
How Often Should Brushes Be Replaced in Household Appliances?
Think of your appliance’s brushes as the heartbeat of its motor. You should replace brushes during routine appliance maintenance every 12 to 18 months, or sooner if you notice sparking, unusual noise, or decreased performance. Regular brush replacement keeps your appliance running smoothly and prevents damage to other components. Don’t wait until it’s too late—staying proactive with brush replacement guarantees your appliance stays reliable and extends its lifespan.

Jackery Explorer 1000 v2 Portable Power Station,1070Wh LiFePO4 Battery,1500W AC/100W USB-C Output, 1 Hr Fast Charge, Solar Generator for Camping,Emergency, RV, Off-Grid Living(Solar Panel Optional)
Powerful yet Compact: Boasting a 1,500W AC output and a 3,000W surge peak, the Solar Generator 1000 V2...
As an affiliate, we earn on qualifying purchases.
Conclusion
To keep your device humming like a well-oiled machine, regularly check those capacitors and brushes for wear and tear. Don’t forget, even in the age of steam, a simple inspection can save you from future trouble—think of it as your modern-day blacksmith tending to his forge. By staying vigilant, you’ll guarantee consistent low voltage output and avoid the pitfalls of neglect. After all, a stitch in time saves nine, even in our fast-paced technological era.

Jackery Portable Power Station Explorer 300, 292Wh Backup LiFePO4 Battery, Solar Generator for Outdoors Camping Travel Hunting Blackout (Solar Panel Optional)
Ultra-Lightweight: At only 7.5 lbs, the Explorer 300 delivers a robust 292Wh capacity while remaining 17% lighter than...
As an affiliate, we earn on qualifying purchases.

EF ECOFLOW Portable Power Station DELTA 2, 1024Wh LiFePO4 (LFP) Battery, 1800W AC/100W USB-C Output, Solar Generator(Solar Panel Optional) for Home Backup Power, Camping & RVs
7 X Faster Charging. 0-80% in just 50 mins and 0-100% in 80 mins with AC input. That's...
As an affiliate, we earn on qualifying purchases.