
If you’re facing low voltage output issues, start by checking power supply stability, including fluctuations and overheating. Confirm your grounding is solid and free of ground loops, and verify all connections and connectors aren’t corroded or loose. Excessive wiring length, poor load management, and faulty regulators can also cause trouble. Using advanced diagnostic tools like oscilloscopes or thermal cameras helps pinpoint hidden faults. Keep exploring to uncover deeper causes and solutions.
Key Takeaways
- Examine power supply stability, including battery health and thermal management, to prevent voltage fluctuations caused by internal anomalies.
- Identify and eliminate ground loops and improper grounding practices to reduce noise and voltage instability.
- Check for voltage drops from excessive wiring length, degraded connectors, or overloaded circuits impacting output levels.
- Detect interference from electromagnetic or radio frequency sources that can induce voltage fluctuations in sensitive circuits.
- Inspect and replace faulty components, such as voltage regulators and solder joints, using diagnostic tools for precise troubleshooting.

HOW TO USE AN OSCILLOSCOPE: Practical Techniques for Signal Measurement, Circuit Testing, and Electronics Troubleshooting
As an affiliate, we earn on qualifying purchases.
As an affiliate, we earn on qualifying purchases.
Power Supply Anomalies and Fluctuations
Power supply anomalies and fluctuations can considerably impact low voltage output, often causing instability in electronic devices. When your power source experiences issues, it can lead to inconsistent voltage levels, affecting device performance. Battery capacity plays a vital role here; if the battery can’t store enough energy or is nearing depletion, voltage drops become more likely. Proper thermal management also matters—overheating can impair internal components, leading to fluctuations. If your system isn’t cooled effectively, thermal stress can cause voltage instability, reducing overall output quality. Monitoring both battery capacity and thermal conditions helps maintain stable voltage levels. Additionally, ensuring regular air purifier maintenance can prevent dust buildup that might contribute to overheating or electrical issues. Addressing these anomalies promptly ensures your devices operate reliably, preventing unexpected shutdowns or erratic behavior caused by unstable low voltage supply.

TOPDON TC004 Mini Thermal Imaging Camera, 240 x 240 TISR Resolution, 15-Hour Battery Life, 128 x 128 IR Resolution, 25Hz Handheld Infrared Camera with High/Low Temp Alerts, Auto Shutdown- Blue
【Enhanced Thermal Clarity】Start with 128×128 thermal imaging and enhance to 240×240 resolution with TISR technology for greater details….
As an affiliate, we earn on qualifying purchases.
As an affiliate, we earn on qualifying purchases.
Voltage Drop Due to Excessive Wiring Length or Resistance

Long wiring runs can cause significant voltage drops, reducing the power reaching your device. As wiring length increases, resistance also rises, leading to more voltage loss along the circuit. Understanding how wiring length and resistance impact voltage helps you troubleshoot low voltage issues effectively. For automotive applications, such as ECU tuning in Honda models, maintaining proper voltage levels is crucial for optimal performance.
Wiring Length Impact
When wiring runs become excessively long, the resistance within the wire increases, leading to a significant voltage drop before the current reaches your device. This impact is critical in circuit design, as longer wires require careful planning to maintain voltage levels. To counteract this, you should optimize component selection, choosing thicker gauge wires that reduce resistance. Shorter wiring runs are preferable, but if long runs are unavoidable, consider using higher-quality conductors or adding voltage regulators. Properly sizing your wiring and considering the overall layout ensures your low voltage output remains stable. Remember, the goal is to minimize voltage loss by balancing wiring length and component choice, preserving the integrity of your circuit’s performance. Additionally, understanding resources and tools available can help you better plan and troubleshoot wiring issues effectively.
Resistance and Voltage Loss
As wiring resistance increases, it causes a voltage drop that can substantially reduce the voltage reaching your device. To prevent this, you should perform resistance measurement to identify high-resistance points in your wiring. Excessive resistance hampers voltage regulation, leading to unstable or insufficient power output. Long wiring runs or thin gauge wires elevate resistance, making voltage loss inevitable. By keeping resistance low through proper wire sizing and shorter runs, you guarantee more consistent voltage levels. Regular resistance measurement helps detect potential issues before they impact your system’s performance. Remember, minimizing resistance is vital for maintaining effective voltage regulation, especially in low voltage output applications. Addressing resistance and voltage loss early ensures your device receives a stable, reliable power supply, avoiding performance dips or damage. Additionally, understanding AI security vulnerabilities can help in designing more resilient electrical systems.

HD Adjustable Voltage Regulator Kit – Fits Chrysler Dodge Plymouth Jeep 1970–1987 – Includes C8313 Regulator & 2-Pin Connector – Replaces 3438150, 10463282, GRE538, CH-543, Solid-State Design
✅ Compatible with 1970–1987 Chrysler, Dodge & Plymouth Models – Ideal for restorations, electrical upgrades, or voltage tuning…
As an affiliate, we earn on qualifying purchases.
As an affiliate, we earn on qualifying purchases.
Faulty or Degraded Connectors and Terminals

Faulty or degraded connectors and terminals are common causes of low voltage output issues. Over time, connector corrosion can develop, especially in humid environments, leading to poor electrical contact. Terminal oxidation, a form of corrosion, creates a layer of insulation that impedes current flow. If connectors appear dirty, discolored, or damaged, they likely contribute to voltage drops. Loose or broken connections further worsen the problem by increasing resistance. Regular inspection and cleaning can prevent these issues; use contact cleaners and ensure tight connections. Replacing corroded or damaged connectors and terminals restores proper conductivity, ensuring your system maintains the correct voltage levels. Addressing connector corrosion and terminal oxidation promptly keeps your electrical connections reliable and prevents more significant failures down the line. Additionally, understanding vetted products and proper maintenance techniques can help ensure long-term system stability.

KKnoon 150W 20A Adjustable Constant Current Electronic Load 2.4inch TFT Color Display 4 Working Modes USB Lithium Battery Capacity Monitor Tester Discharge Meter
✔️This product is a direct current CNC electronic load, with a maximum power of 150W and a maximum…
As an affiliate, we earn on qualifying purchases.
As an affiliate, we earn on qualifying purchases.
Grounding Issues and Ground Loops

Grounding issues and ground loops are common causes of low voltage output problems. You need to guarantee proper grounding techniques to avoid noise and interference. Recognizing ground loops and taking steps to prevent ground noise can markedly improve your system’s performance. Utilizing sound recording techniques can help identify and mitigate these issues more effectively.
Proper Grounding Techniques
Proper grounding is essential for maintaining low voltage output and preventing noise or interference in your system. To achieve this, follow effective grounding protocols that ensure a single, solid ground reference. Use shielding strategies to minimize electromagnetic interference, wrapping cables with shielded sleeves or foil to block external noise sources. Keep grounding connections short and direct, avoiding multiple ground paths that can create loops and introduce hum. Always connect all components to a common ground point to maintain consistency. Proper grounding reduces voltage fluctuations and enhances signal integrity. Regularly inspect connections for corrosion or loose contacts. Additionally, employing grounding standards helps ensure your system adheres to best practices, further minimizing potential issues. By adhering to these grounding techniques, you create a stable and noise-free environment for your low voltage system, guaranteeing maximum performance and reliability.
Identifying Ground Loops
When multiple ground paths exist in your system, unwanted current loops can form, causing noise and voltage fluctuations. To effectively address this, you need to focus on ground loop identification. Start by checking all ground connections for potential differences; a multimeter can help you detect unintended current flow. Look for signs like hums, crackles, or inconsistent signals, which often indicate ground loops. Once identified, use noise mitigation strategies such as isolating grounds or simplifying the grounding scheme. Remember, reducing multiple ground paths minimizes the chance of current loops forming. Proper ground loop identification is *essential* for maintaining signal integrity and ensuring your low voltage outputs remain clean and stable. Staying informed about grounding techniques can further aid in preventing issues. Stay vigilant, and you’ll prevent many common grounding issues before they escalate.
Preventing Ground Noise
To effectively prevent ground noise from affecting your low voltage outputs, you must implement strategies that minimize ground loops and guarantee a stable reference point. Ground noise mitigation begins with proper grounding techniques, ensuring all equipment shares a single, solid ground connection. Use star grounding configurations to avoid loops that can introduce interference. Incorporate shielding techniques, such as shielding cables and enclosures, to block electromagnetic interference from external sources. Keep signal and power grounds separate when possible, then connect them at a single point to reduce noise coupling. Regularly inspect grounding connections for corrosion or looseness. Additionally, understanding the horsepower of electric dirt bikes can help you select appropriate equipment and grounding methods for high-performance setups. By combining these methods, you’ll create a cleaner, more stable system that considerably reduces ground noise and enhances your low voltage output performance.
Inadequate Load Management and Overloading
Inadequate load management can directly cause low voltage output issues by overloading the power system. When you don’t properly balance the load across circuits, some become overloaded, exceeding their capacity. This overload reduces the available voltage, leading to fluctuations and instability. To avoid this, guarantee proper load balancing by distributing devices evenly among circuits, preventing any one circuit from exceeding its capacity. Regularly assess your circuit capacity and avoid adding too many high-power devices to a single line. Overloading not only causes voltage drops but can also damage your wiring and equipment over time. By managing loads effectively, you maintain stable voltage levels and protect your system’s integrity. Proper load management is essential for consistent, reliable low voltage output. Additionally, utilizing power management tools can help monitor and optimize load distribution to prevent overloads.
Interference From Electromagnetic and Radio Frequency Sources

Electromagnetic and radio frequency (RF) sources can substantially disrupt low voltage output by introducing interference that distorts the electrical signals. This type of interference, known as EM interference or RF interference, can originate from nearby electronic devices, wireless transmitters, or power lines. When these sources emit electromagnetic waves, they can couple into your circuits, causing fluctuations and voltage drops. Such interference is especially problematic in sensitive low voltage applications, where even minor disturbances can impact performance. To minimize this, guarantee proper grounding, use shielding techniques, and keep high-frequency devices away from your power lines and sensitive components. Recognizing and mitigating EM and RF interference helps maintain stable, accurate low voltage output, preventing unexpected fluctuations and ensuring your system’s reliability.
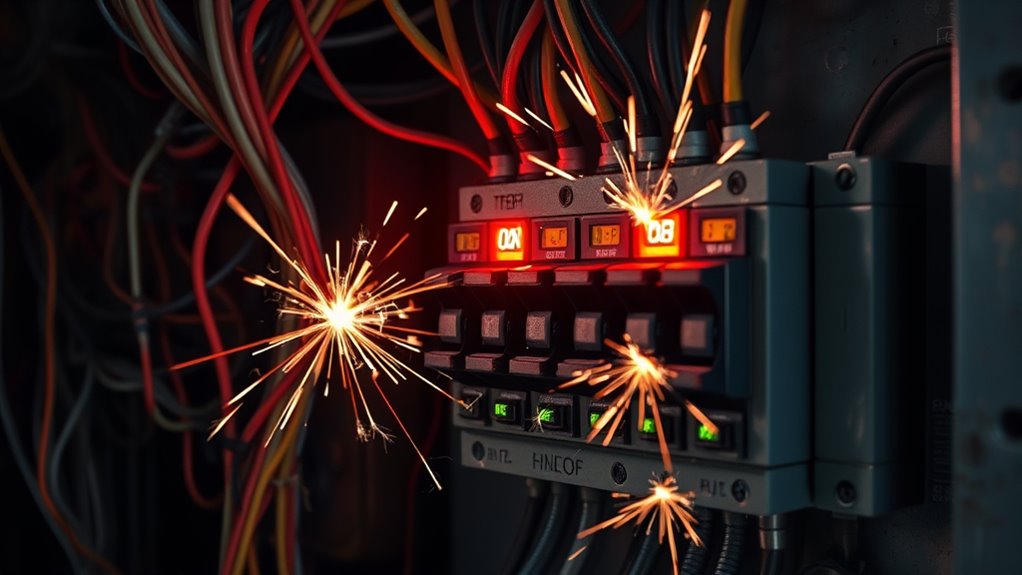
Malfunctioning Voltage Regulators and Power Modules
When voltage regulators or power modules malfunction, your system’s output can drop below desired levels. Common failures include overheating, component wear, or poor connections that compromise performance. Understanding these issues and applying effective troubleshooting techniques can help you quickly identify and fix the root causes.
Common Regulator Failures
Malfunctioning voltage regulators and power modules are common culprits behind low voltage output issues. Over time, component aging can cause regulators to drift from their calibrated settings, leading to unstable or insufficient voltage regulation. If the regulator’s calibration becomes inaccurate, the output voltage may drop below required levels, affecting your circuit’s performance. Additionally, aging components such as capacitors or internal transistors can develop faults, causing inconsistent regulation or complete failure. Heat, stress, and extended use accelerate these failures, making regular checks essential. When you notice voltage irregularities, inspecting for signs of wear, recalibrating the regulator, or replacing aging parts can restore proper function. Addressing these common failures prevents more significant system issues and ensures reliable low voltage output.
Impact of Power Modules
How do faulty power modules affect your system’s performance? They can cause unstable voltage output, leading to erratic behavior or system failures. Poor power module selection may result in excessive heat, reduced efficiency, and shortened lifespan. To optimize efficiency, choose modules that match your voltage and current needs precisely. Here’s a quick comparison:
| Aspect | Impact of Malfunctioning Power Modules |
|---|---|
| Voltage Stability | Fluctuations cause errors and resets |
| Efficiency | Lower efficiency increases power waste |
| Heat Generation | Excess heat damages components |
| System Reliability | Frequent failures reduce uptime |
| Maintenance Costs | Increased repairs and replacements |
Troubleshooting Techniques
Troubleshooting voltage regulators and power modules requires a systematic approach to identify and resolve issues efficiently. Start by checking signal integrity to ensure clean, stable signals without noise or interference, which can cause voltage fluctuations. Next, verify component compatibility to confirm that all parts work together within their specified parameters. Use a multimeter or oscilloscope to monitor output voltages and look for irregularities. If the voltage is inconsistent, inspect for damaged or loose connections, overheating, or faulty components. Always cross-reference datasheets to confirm the correct specifications. Addressing issues methodically helps you pinpoint whether problems stem from signal integrity disruptions or incompatible components, ultimately restoring the proper function of your voltage regulators and power modules.
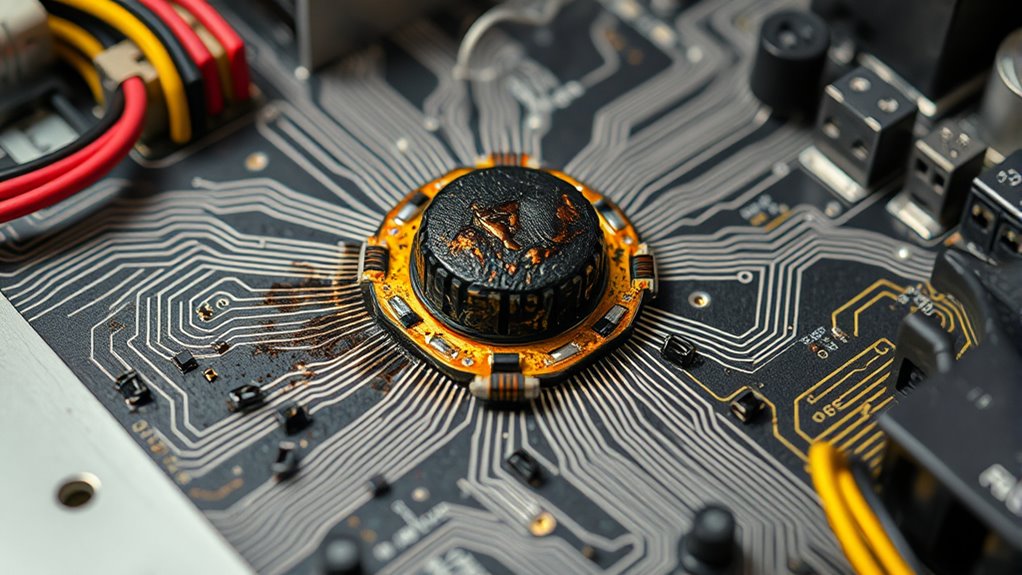
Incorrect or Loose Circuit Components and Solder Joints
Incorrect or loose circuit components and solder joints are common causes of low voltage output issues. Loose solder joints can create poor connections, leading to voltage drops and unstable signals. You might notice intermittent operation or voltage fluctuations if solder joints aren’t secure. Circuit component issues, such as damaged resistors, capacitors, or cracked ICs, can also reduce output voltage by disrupting current flow. Always inspect your circuit visually for any signs of loose solder or cracked components. Use a magnifying glass if needed. Re-solder any weak joints and replace faulty components to restore proper voltage levels. Ensuring all connections are solid and components are intact is essential for maintaining a stable, high-quality low voltage output.
Environmental Factors Affecting Circuit Performance

Environmental factors such as temperature, humidity, and exposure to dust or chemicals can substantially impact circuit performance. These environmental stressors, especially temperature fluctuations, can cause components to expand or contract, leading to performance issues. To minimize risks, consider these key points:
- Temperature stability: Keep circuits within recommended temperature ranges to prevent thermal stress.
- Humidity control: Excess moisture can cause short circuits or corrosion, so maintain proper sealing.
- Dust and chemicals: Contaminants can interfere with connections and degrade components over time.
- Environmental shielding: Use enclosures or protective coatings to shield sensitive parts from external stressors.
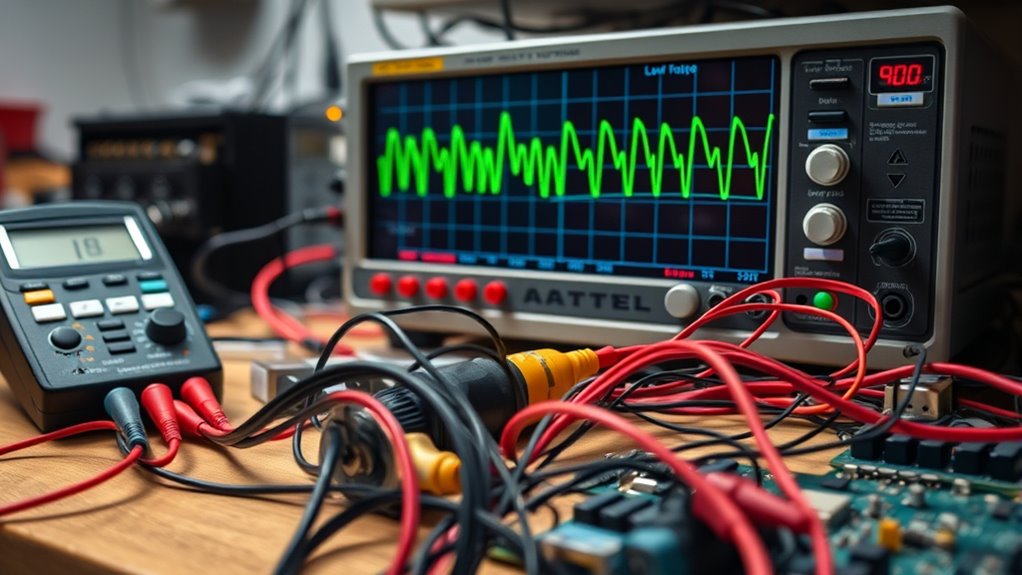
Advanced Diagnostic Tools and Techniques for Troubleshooting
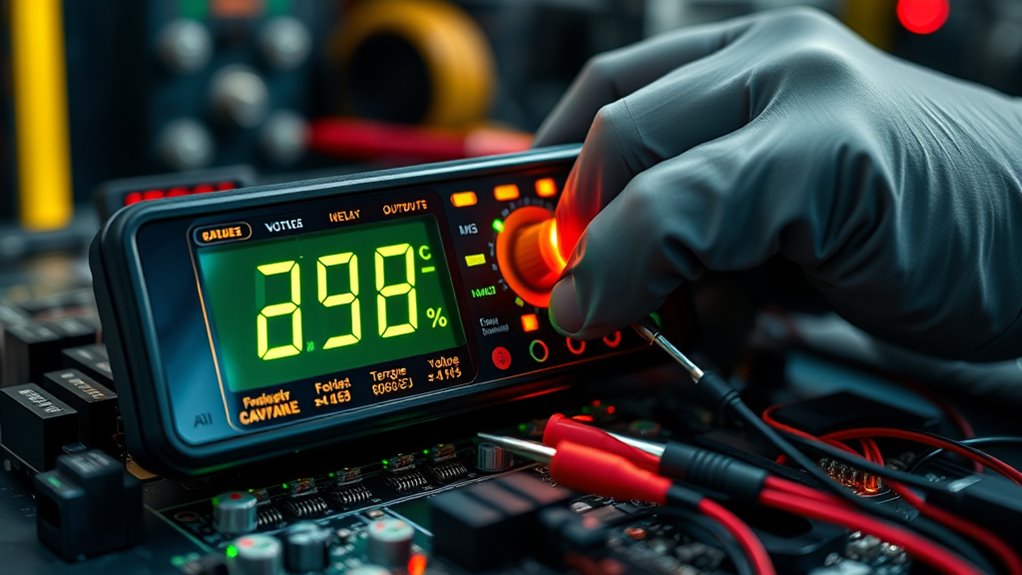
To effectively identify and resolve issues in low voltage output circuits, leveraging advanced diagnostic tools is essential. Start with high-precision multimeters and oscilloscopes to analyze signal integrity, focusing on signal filtering to eliminate noise that obscures true voltage levels. Understanding battery chemistry helps in selecting the right testing protocols, as different chemistries respond uniquely under load. Use specialized tools like spectrum analyzers for detailed frequency analysis, revealing subtle faults. Thermal cameras can detect hotspots indicating failing components. Incorporate current probes to measure real-time flow, pinpointing bottlenecks. Combining these techniques allows you to diagnose faults accurately, ensuring your low voltage outputs remain stable and reliable. Mastering these tools empowers you to troubleshoot efficiently and maintain ideal circuit performance.
Frequently Asked Questions
How Can I Identify Subtle Voltage Drops Not Caused by Classic Issues?
You can identify subtle voltage drops by carefully inspecting your setup for ground loops, which may cause minor fluctuations, and checking for electromagnetic interference from nearby devices. Use a high-precision multimeter to measure voltage at different points, noting inconsistencies. Also, eliminate potential interference sources, such as wireless signals or motors, and verify proper grounding. These steps help reveal subtle voltage issues beyond classic causes, ensuring accurate diagnosis.
What Are the Signs of Advanced Low Voltage Output Problems in Complex Systems?
You might notice your system flickering like a candle in the wind, signaling advanced low voltage output issues. Watch for persistent voltage ripple and subtle power sag that cause equipment to stutter or malfunction unexpectedly. These signs indicate your system struggles to maintain stable voltage, risking damage or failure. Staying alert to these cues helps you catch problems early, ensuring your system stays resilient and confident under pressure.
How Do Temperature Fluctuations Specifically Impact Low Voltage Circuit Stability?
Temperature fluctuations can seriously impact your low voltage circuit stability. As temperatures rise and fall, thermal expansion occurs in components, causing physical changes that affect connections. This leads to conduction variability, making voltage output unpredictable. You might notice fluctuations or signal drops. To prevent this, guarantee proper thermal management, use stable components, and monitor your system’s temperature regularly to maintain consistent low voltage performance.
Can Software or Firmware Glitches Cause Low Voltage Output Anomalies?
Oh, absolutely! When you blame software bugs or firmware errors for low voltage output anomalies, you’re practically inviting chaos. These glitches can cause unpredictable voltage drops or surges, disrupting your circuit’s stability. Firmware errors, like mischievous gremlins, can corrupt voltage regulation routines, leaving your system vulnerable. So, yes, flawed software or firmware can definitely be the sneaky culprits behind those mysterious low voltage issues you’re trying to troubleshoot.
What Are the Latest Tools for Diagnosing Hidden or Intermittent Low Voltage Faults?
You can use thermal imaging to detect hidden or intermittent low voltage faults by identifying unusual heat patterns in circuits. Circuit simulation tools help you model and predict fault behavior, pinpointing issues that aren’t immediately visible. Combining thermal imaging with simulation software gives you a thorough approach to diagnosing elusive faults, enabling you to trace irregularities and ensure your low voltage output stays stable and reliable.
Conclusion
Think of your low voltage output as a delicate river flowing smoothly. When anomalies arise, it’s like debris blocking the stream, causing turbulence and stagnation. By understanding each fault as a pebble in the path, you can clear the flow and restore confidence. With the right tools and techniques, you become the steady hand guiding the waters back to calm, ensuring your circuit’s heartbeat remains strong and reliable.