
To fix a stuck recoil starter, start by removing it from the engine and carefully disassembling the housing to access the spring and internal parts. Check the spring for damage, clean it thoroughly, and lubricate it with a high-quality lubricant. Also, inspect and adjust the cable for proper tension and free movement. Reassemble the unit carefully, ensuring all parts are correctly seated and tensioned. If you keep exploring, you’ll find detailed steps to restore smooth recoil operation.
Key Takeaways
- Carefully disassemble the recoil housing, noting spring tension and all components to prevent injury or damage.
- Inspect the recoil spring for damage, clean it thoroughly, and replace if worn or broken.
- Lubricate the spring and moving parts with appropriate high-quality lubricant for smooth operation.
- Reassemble the recoil starter, ensuring the spring is properly seated and tensioned before final assembly.
- Test the recoil multiple times after reassembly to confirm smooth function and address any sticking issues.

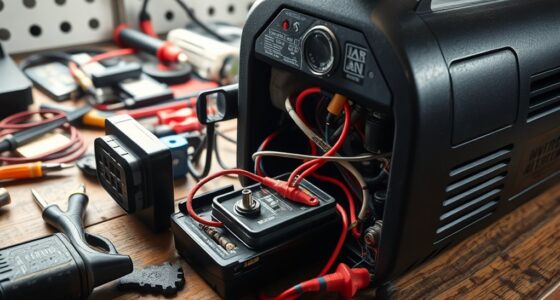
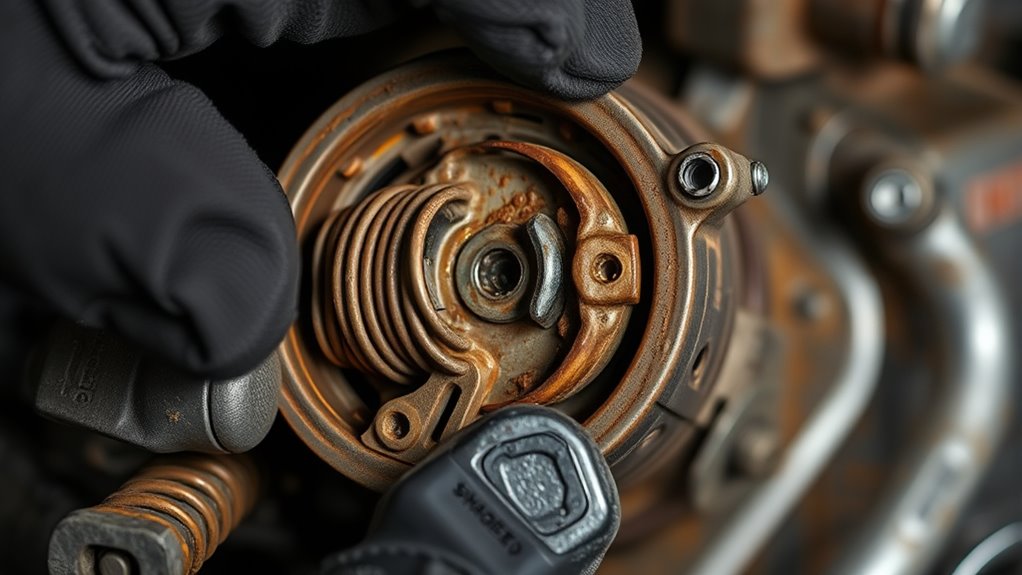
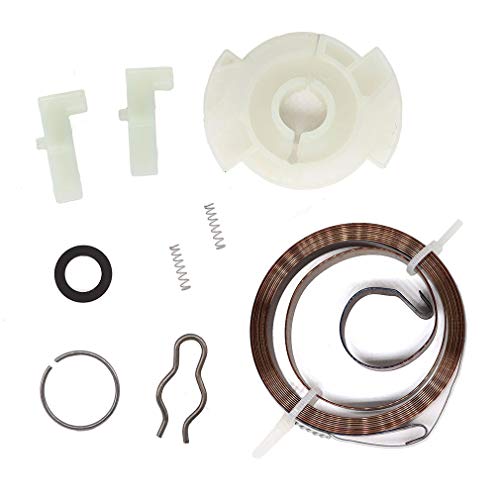
If your recoil starter is stuck and won’t recoil properly, it can make starting your engine frustrating and difficult. One common cause is a problem with the spring or cable. To fix it, you’ll need to disassemble the recoil starter and perform some basic spring repair and cable adjustment. This process restores smooth operation and prevents future sticking issues. Proper disassembly technique is essential to avoid damaging components during the repair process. Start by removing the recoil assembly from your engine. Usually, this involves unscrewing a few nuts or bolts. Once you have the recoil starter in hand, carefully disassemble the housing. Be cautious because the recoil spring is under tension and could snap out unexpectedly. To avoid injury and damage, keep a finger or a cloth over the spring during disassembly. When you access the inside components, inspect the spring for signs of damage or corrosion. If the spring is broken or excessively worn, replacing it is the best course of action. If it just needs a little maintenance, you can proceed with spring repair by cleaning and lubricating it with a high-quality lubricant suitable for metal springs. This will help guarantee it recoils smoothly and doesn’t stick.
Next, evaluate the cable adjustment. Over time, the pull cord cable can stretch or become misaligned, causing the recoil to stick or fail to retract fully. To fix this, check if the cable is tight and properly seated in its pulley and handle. If the cable is loose, adjust it by tightening the cable clamp or re-routing it through the pulley system. Adjusting the cable length ensures that the recoil mechanism engages and disengages correctly, leading to smoother retraction. Proper cable adjustment is vital because it prevents the recoil from sticking when you pull or release it.
After repairing or replacing the spring and adjusting the cable, reassemble the recoil starter carefully. Lubricate the moving parts lightly with a suitable lubricant to facilitate smooth operation. When reassembling, ensure that the spring is correctly seated and tensioned, and that the cable moves freely without binding. Once reassembled, test the recoil starter by pulling the cord a few times. It should recoil smoothly without sticking. If it still doesn’t work properly, double-check your spring repair and cable adjustment steps.
Taking these steps—disassembly, spring repair, and cable adjustment—can save you time and money while restoring your recoil starter’s functionality. Regular maintenance and timely repairs will keep your engine starting reliably, avoiding the frustration of a stuck recoil mechanism.
AISEN Recoil Starter Repair Kit for 593959 590588 591139 595355 593961 08P502 093J02 09P602 09P702 450E 500E 550E 575E 140CC Engines
Replaces for 593959 590588 591139 595355 593961
As an affiliate, we earn on qualifying purchases.
As an affiliate, we earn on qualifying purchases.
Frequently Asked Questions
Can I Fix a Stuck Recoil Starter Myself Without Professional Help?
Yes, you can do a DIY repair on your stuck recoil starter, but make sure to follow safety precautions. Carefully disassemble the recoil starter, clean and lubricate the parts, and reassemble it properly. Use the right tools and work in a safe environment to avoid injury. If you’re unsure or uncomfortable, consider consulting a professional. Proper safety measures help prevent accidents and guarantee the repair is successful.
How Often Should I Lubricate the Recoil Starter for Optimal Performance?
You should lubricate your recoil starter every 50 to 100 hours of use or at least once a season, whichever comes first. Proper maintenance involves applying light lubricant to the recoil spring and pulley to prevent rust and guarantee smooth operation. Regular lubrication helps avoid sticking and prolongs the starter’s lifespan. Keep an eye on how it feels during use, and don’t forget to clean it before lubing for best results.
What Signs Indicate the Recoil Starter Needs Repair or Replacement?
Your recoil starter is crying out for help when you notice signs of wear like frayed or cracked pull cords, or if it feels loose and sloppy. Unusual noises, such as grinding or squeaking, signal internal issues needing attention. If pulling the cord becomes difficult or the recoil doesn’t retract smoothly, it’s time for repair or replacement. Don’t ignore these signs—they’re your engine’s way of asking for help before bigger damage occurs.
Are There Specific Lubricants Recommended for Recoil Starter Maintenance?
You should use a lightweight, high-quality lubricant compatible with your recoil starter’s materials, like a silicone spray or light machine oil. Always check the manufacturer’s recommendations for lubricant compatibility to avoid damage. Incorporate lubrication into your maintenance schedule, applying it sparingly to the recoil spring and pulley. Regular lubrication reduces friction, prevents sticking, and extends the life of your recoil starter.
Will Disassembling the Recoil Starter Void My Equipment’s Warranty?
Disassembling your recoil starter can impact your warranty, as it may void the warranty if it’s considered unauthorized repair or modification. You should always weigh the disassembly risks, like damaging parts or losing components, against potential benefits. To avoid warranty issues, consult your equipment’s warranty policy or contact the manufacturer first. Doing so keeps your options open and guarantees you won’t face warranty implications for routine maintenance.

YAMAKATO Recoil Starter Spring for Honda gx120 gx140 gx160 gx200 28442-ZH8-003 Pull Strat Spring 5hp 5.5hp 6hp 6.5hp 163cc 196cc
For Honda GX 120 GX 140 GX 160 GX 200 and Chinese 168FA 168FB 170F 5.5 HP 6.5…
As an affiliate, we earn on qualifying purchases.
As an affiliate, we earn on qualifying purchases.
Conclusion
By following these simple disassembly and lubrication steps, you can easily fix a stuck recoil starter and get your equipment running smoothly again. Did you know that regular maintenance can extend the life of your engine by up to 30%? Taking just a few minutes to lubricate and check your recoil starter now can save you time and money later. Keep it well-maintained, and your tools will always be ready when you need them most.

Umarex RWS Air Gun Spring Cylinder Oil, 1 Ounce
For use with spring powered airguns
As an affiliate, we earn on qualifying purchases.
As an affiliate, we earn on qualifying purchases.

Recoil Starter And Engine Control Cable Replacement For 5521CHV 532183567 GCV160
Fits models including 5521CHV, 5521RS, 54021CHV, 214502X83E, 219611X83E, 319611X83E, 5422SL, 62522SH, PH65Y21RHP, PR160Y21RPC, PR173Y22RP, PR600T21RHP, PR600Y22SHP, PR625Y22RHP, PR625Y22RP,…
As an affiliate, we earn on qualifying purchases.
As an affiliate, we earn on qualifying purchases.