
To clear float and needle valve issues causing carburetor flooding, start by removing the carburetor and inspecting the float for leaks or damage. Clean the float and needle valve with carburetor cleaner to remove debris or buildup. Check and adjust the float height according to the manufacturer’s specs to make certain of proper fuel levels. If the float or needle valve is damaged, replace them. Continue to explore the steps to fully restore your carburetor’s function.
Key Takeaways
- Inspect and replace a damaged or waterlogged float to prevent excess fuel flow.
- Clean or replace a faulty needle valve to ensure proper sealing and shutoff.
- Adjust the float height according to manufacturer specifications for optimal fuel levels.
- Clear any debris or varnish from jets and passages to restore proper fuel flow.
- Reassemble the carburetor carefully, then test the engine for smooth, reliable operation.

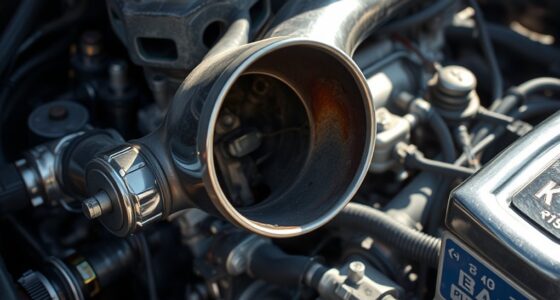
Have you ever experienced your engine struggling to start or running rough despite turning the key? If so, you might be dealing with carburetor flooding, a common issue that disrupts your engine’s fuel mixture and hampers overall engine performance. Carburetor flooding occurs when too much fuel enters the combustion chamber, often because of problems with the float or needle valve inside the carburetor. When these parts malfunction, they fail to regulate fuel flow properly, leading to an overly rich fuel mixture that makes starting difficult and causes rough running once the engine is running.
The float inside your carburetor plays a crucial role in maintaining the right fuel level. If the float becomes stuck or develops a leak, it can cause the needle valve to stay open longer than it should, allowing excess fuel to flood the carburetor. This excess fuel can flood the combustion chamber, preventing the engine from igniting properly or causing it to stall shortly after starting. To fix this, you need to inspect the float for damage or sticking. Usually, removing the carburetor cover and gently shaking it will reveal if the float is waterlogged or damaged—if it sinks, it’s time for a replacement.
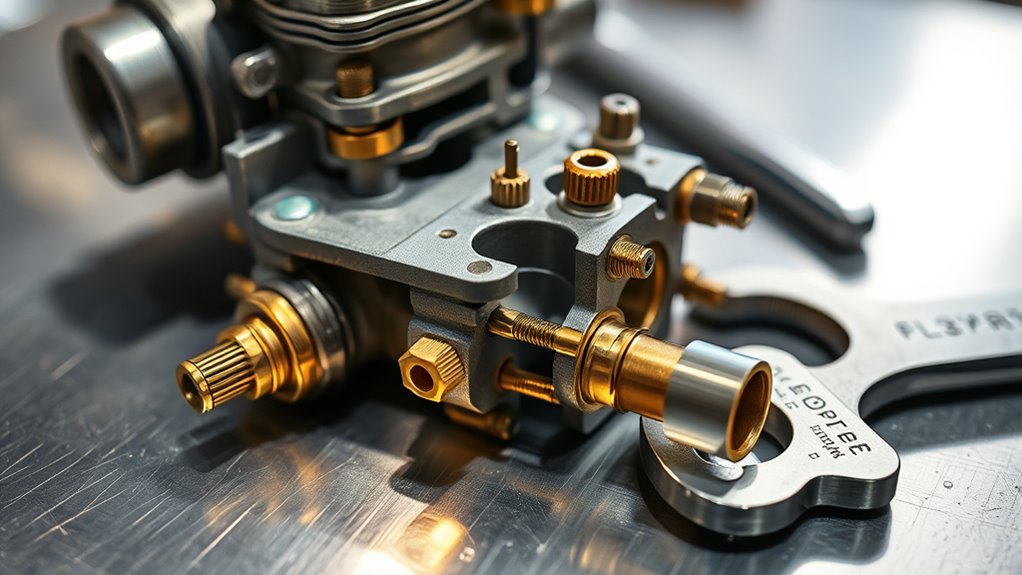
Next, check the needle valve for debris or wear. Dirt, varnish buildup, or a worn-out needle can prevent it from closing tightly. A faulty needle valve won’t shut off the fuel supply when the float reaches its proper level, leading to flooding. Carefully clean or replace the needle valve if necessary. Sometimes, debris or sediment can clog the valve, so a thorough cleaning of the entire carburetor might be required. Using carburetor cleaner and a soft brush can help remove stubborn deposits that interfere with proper fuel regulation.
Once you’ve addressed these mechanical issues, resetting the float height according to the manufacturer’s specifications can restore ideal fuel levels. Correct float height ensures the right fuel mixture, which is essential for smooth engine performance and efficient combustion. It’s also important to check for clogged jets and ensure that the carburetor is free of debris to maintain optimal fuel flow. After making adjustments, reassemble everything carefully and test your engine. If it starts smoothly and runs without hesitation or stalling, you’ve successfully cleared the flooding problem. Remember, consistent maintenance of the float and needle valve prevents future flooding issues and keeps your engine running at its best.

2 x Carburetor carb Float Assembly Fit for Polaris Sportsman 500 1998-2012# 3130921
Carburetor Float fit for Polaris Sportsman 500 1998-2012.
As an affiliate, we earn on qualifying purchases.
As an affiliate, we earn on qualifying purchases.
Frequently Asked Questions
Can Carburetor Flooding Cause Engine Damage?
Yes, carburetor flooding can cause engine damage. When flooding occurs, excess fuel messes up the fuel mixture and blocks airflow through the air intake. This can lead to poor engine performance, increased wear, or even engine failure if not addressed promptly. You should check the float and needle valve to stop flooding, ensuring the proper fuel mixture and airflow, and prevent long-term damage.
How Often Should I Check the Float and Needle Valve?
You should check the float level and needle inspection every 25 to 50 hours of operation or monthly, whichever comes first. Regularly monitoring these components helps prevent issues that could lead to engine strain. Think of it as tending a delicate balance—staying attentive keeps your engine running smoothly. By maintaining a consistent schedule, you catch potential problems early, ensuring ideal performance and longevity for your equipment.
Are There Preventive Measures to Avoid Flooding?
To prevent flooding, you should regularly perform fuel system maintenance, including inspecting the float and needle valve for wear or damage. Keep your carburetor clean by removing any debris or buildup that could hinder proper function. Using fresh fuel and ensuring the float isn’t sticking also helps. Consistent maintenance and carburetor cleaning reduce the risk of flooding, keeping your engine running smoothly and avoiding costly repairs.
What Tools Are Needed to Fix Flooding Issues?
You’ll need diagnostic techniques and repair tools like a screwdriver, pliers, and a carburetor cleaner to fix flooding issues. Start by inspecting the float and needle valve, using a screwdriver to remove the carburetor cover. Use pliers to adjust or replace faulty parts, and apply carburetor cleaner to clear any clogs. These tools streamline troubleshooting, helping you quickly identify and resolve flooding problems with confidence.
Is It Safe to Drive With a Flooded Carburetor?
You shouldn’t drive with a flooded carburetor because it can cause engine damage or stall unexpectedly. Instead, perform carburetor cleaning and float adjustment to fix the issue. These steps help restore proper fuel flow and prevent flooding. Before driving again, verify the carburetor is dry, the float is correctly adjusted, and the needle valve is functioning properly to keep your engine running smoothly and safely.

ZCZQC 2pcs 398188 281144 Carburetor Float Valve Needle Seat Kit Briggs Stratton 398188 Fuel Supply System Carburetors
Replacement Part Numbers: 398188, 281144.
As an affiliate, we earn on qualifying purchases.
As an affiliate, we earn on qualifying purchases.
Conclusion
Remember, addressing carburetor flooding often comes down to checking the float and needle valve. If you ignore small signs, you might find yourself stranded unexpectedly—that’s the coincidence. Taking a moment to inspect these parts regularly can save you from bigger issues later. Sometimes, the simple act of maintenance reveals what’s hidden beneath, and in doing so, you prevent unexpected downtime. After all, a little prevention now can keep your engine running smoothly when you least expect it.
STA-BIL Carb/Choke & Parts Cleaner – Safe For Oxygen Sensors – Dissolves Gum, Varnish, Dirt, & Carbon Deposits – Cleans unpainted Metal Parts – High Grade Formula, 12.5 oz (22005)
Quickly cleans and dissolves gum, varnish, dirt, lead, and carbon deposits, aiding in faster starts and smooth idling
As an affiliate, we earn on qualifying purchases.
As an affiliate, we earn on qualifying purchases.

Carburetor Carb Float Level Gauge Motorcycle Tool for Any Motorbike
This item is made with High quality materials. All made in Taiwan.
As an affiliate, we earn on qualifying purchases.
As an affiliate, we earn on qualifying purchases.